To Install a mod on Minecraft, the simplest method is to CurseForge, a free app that makes it easy to download mods and configure the ModLoader (Forge, NeoForge Where Fabric).
You can also install mods directly on a server by placing the files in the correct folder.
Here are the two methods, step by step.
Install a mod Minecraft with CurseForge
Step 1: Get the app CurseForge
Before you begin, make sure you have Minecraft already installed on your device. The app CurseForge is free and works just as well on Windows than on Mac. It lets you easily manage and install mods for Minecraft and other games.
To download it:
- Go to the official website CurseForge.
- Click on Get CurseForge App, in the upper-right corner of the screen.
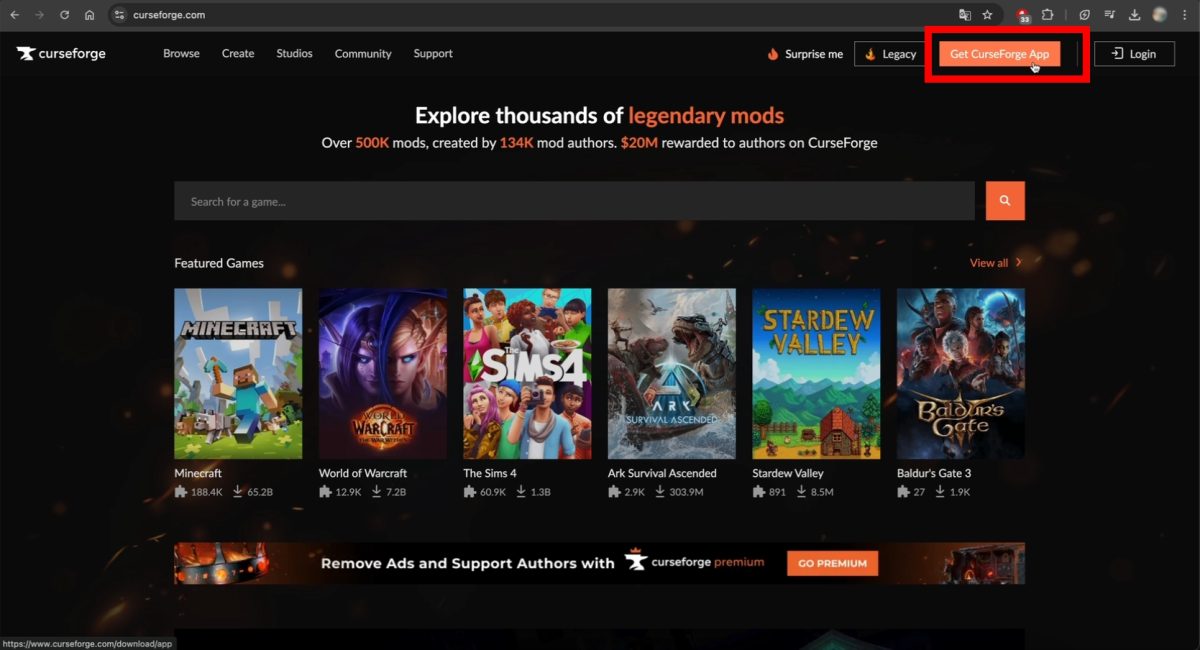
- Press Download Standalone to download the app.

- Once the app is installed, open it.
- Click on the little house icon in the upper-left corner of the screen.
- In Choose a Game, select Minecraft.

Step 2: Install your mod on CurseForge
Once Minecraft Once selected, the screen displays 3 tabs :
- My Modpacks : mods already included in the app.
- Browse : to browse the mod library.
- Servers : for servers.
Before installing anything, check the compatibility between the mod and the ModLoader. The main ModLoaders The available options are:
- Forge
- Fabric
- Quilt
- NeoForge
- Vanilla
Don't worry: if you follow the instructions below, you shouldn't run into any compatibility issues. Here's how to install a mod Minecraft :
- Open the mod library Minecraft.
- Search for the mod you want in the search bar.
In our example, we use Item Despawn Timer. This mod displays a timer above the objects placed in the world, to show you how much time is left before they disappear.

- Click on the Install next to the selected mod.

- A new window will open in your browser: click on Ouvrir CurseForge.

If you'd rather create a mod on Minecraft Instead of using the existing ones, take a look at our dedicated guide.
Step 3: Install a ModLoader on CurseForge
A window opens with two options. You can either select a ModLoader either use an existing one or create a new one. The procedure is the same on Windows and on Mac.
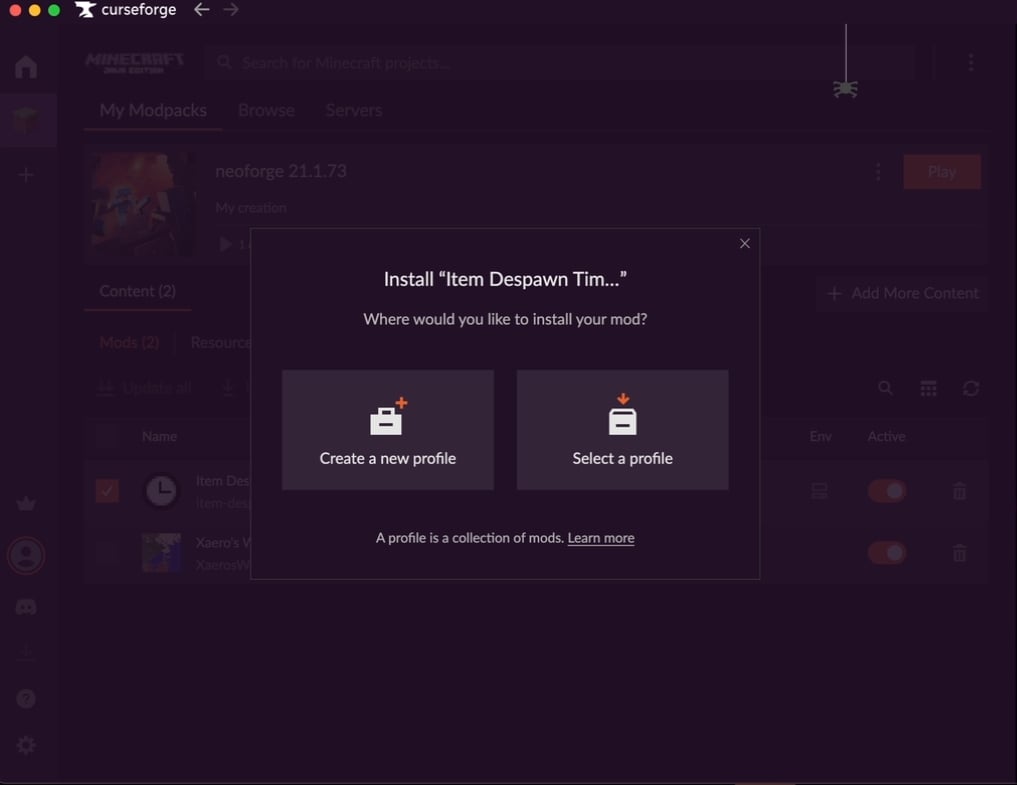
- If there are no compatible profiles, click Create a new profile. The app directly offers you the ModLoader compatible with the correct version of Minecraft.
- Name the profile Forge with the name of the ModLoader and a version to help you find your way around easily.

- If a compatible profile already exists, click Select a profile. The app suggests the ModLoader adapted to the mod version Minecraft.

- Installing the ModLoader Then launch the app. Next, launch Minecraft From this profile in the launcher to load your mods.
Manually access the mods folder in Minecraft
If you want to add or check a mod file directly, here's how to access the mods folder depending on your operating system.
Under Windows : Press the keys Windows + R, type %appdata% then press the Enter key. Next, open the folder .minecraft, then the folder mods. Drag and drop the mod file into it.
Under Mac : opens the Finder, then go to Library > Application Support > Minecraft > mods. Drag the mod file into this folder. Then run Minecraft from the launcher using the correct profile Forge Where Fabric.
How to Install a Mod on Your Server Minecraft ?
If you want to play with mods in multiplayer mode, you'll also need to install them on the server. If you don't have any yet, there are several accommodation offers are available online. Hosterfy is one of them, but the procedure is the same for most web hosts: the menus may vary, but the basic idea is the same.
Step 1: Choosing a Server Minecraft
For your mods to work, your server must be running the correct ModLoader. The most common ones are Forge, NeoForge and Fabric. Your mods must be compatible with the loader you've chosen and with the same version of Minecraft.
On Hosterfy, here's how to check and change that:
- Go to your game control panel.
- Go to Configuration, then Change version, then Forge, and select the appropriate version.

Step 2: Download the mods Minecraft
Download the mod from CurseForge using the method described above. Once you've retrieved the file, you need to access the mods folder to find the .jar file.
Here's how to open this folder:
- Go to My Modpacks, then on the profile of the ModLoader (here Forge).
- Click the three small buttons next to the button Playthen on Open Folder.

- Click on the subfolder mods.
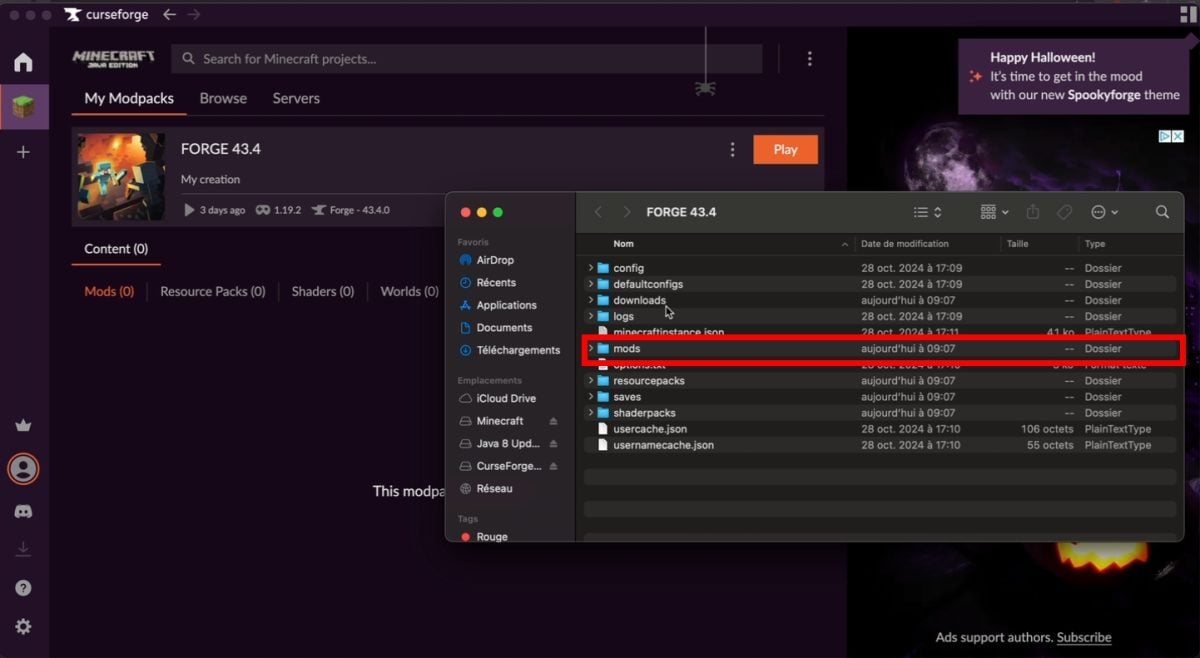
- There you'll find the .jar file of the downloaded mod.
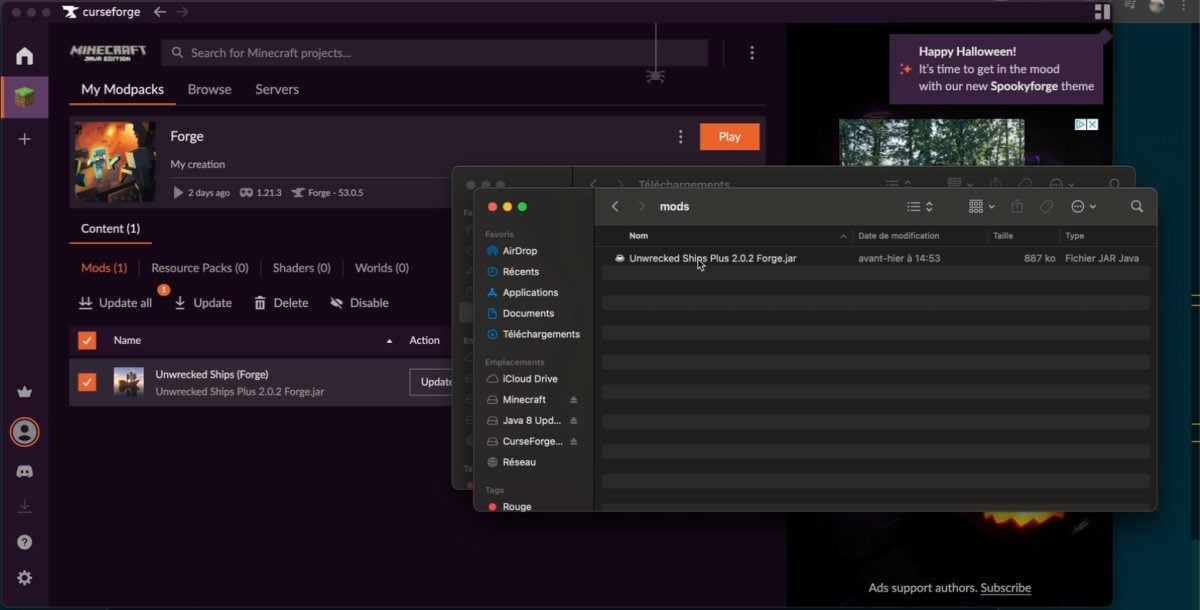
Step 3: Transfer the mods to your server Minecraft
To upload your mods to the server, follow these steps in order:
- Connect to your server by FTP Where SFTP.
- Open the mods folder present on the server.
- Drag and drop your .jar files in this file.
- Restart your server from the management interface so that the mods are taken into account.
This procedure runs on Windows, macOS and linux.
Common problems when installing a mod on Minecraft
Even if you follow the procedure exactly, a mod may refuse to launch. Here are the most common problems, along with a solution for each one.
| Common problem | Solution |
|---|---|
| Crash on startup : One of the mod files is causing a problem. | Check that the Dependency mods are properly installed and that all the mods and Forge are spinning on the same version of Minecraft. |
| Incompatible mods : Two or more mods alter the same aspect of the game. | Remove one of the conflicting mods, or find a version compatible between them. |
| Mod Rejection When Connecting to a Server : The server uses mods that aren't available in your launcher, or vice versa. | Make sure that all the mods on the server are also installed on the client side, in the right mods folder. |
| Message “This server has mods that require the installation of FML/Forge ”on the client" : You're trying to join a modded server from a vanilla version. | Spear Minecraft only from a profile Forge (or the ModLoader (corresponding to the server) in the launcher. |
| Incorrect installation : The mod isn't in the right place. | Go through the procedure again and make sure the mod file is actually in the mods folder of Minecraft. |
Once these issues are resolved, you can enjoy the new items, blocks and custom interfaces provided by your mods Minecraft. If you're still stuck, the comments section is still open. You can also customize your experience by changing your skin or in installing a new map.
To learn more about Minecraft :







 English