You have two GPUs on your PC: the integrated graphics processor (in the processor) and that of your dedicated graphics card.
The problem is Windows sometimes uses the wrong one. To force an application to use your dedicated graphics card, go to Settings > System > Display > Graphics, select the app, then choose High Performance.
Here is the complete, step-by-step tutorial.
Step 1: Settings
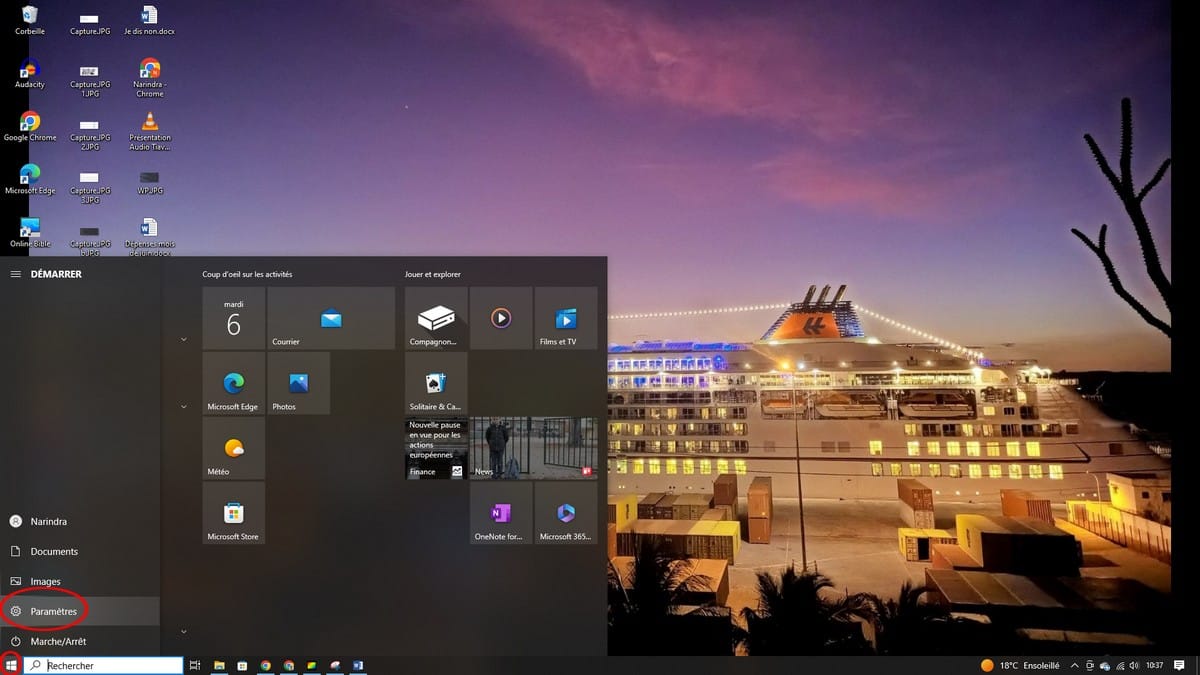
To get started, open the Windows settings. Click on the menu To start upthen on Settings.
This path works just as well under Windows 10 than under Windows 11.
Step 2: Changes
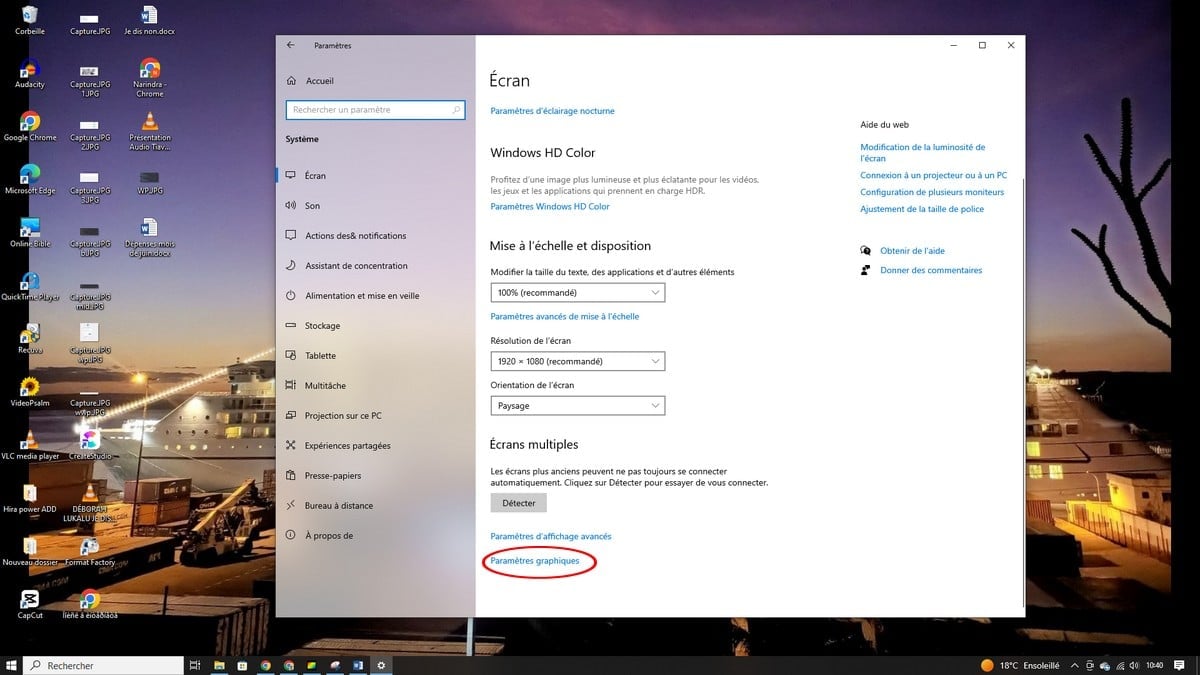
Once you're in the section System, open the page Display and scroll to the bottom of the screen.
Under Windows 11, click on Graphs. Under Windows 10, the entry is called Graphics Settings, but the path remains the same: Settings > System > Display.
This page contains the settings for the GPU preference by application : This is where you'll force each program to run on your Dedicated GPU rather than on the embedded chart.
Step 3: Go to Graphics Performance Preferences
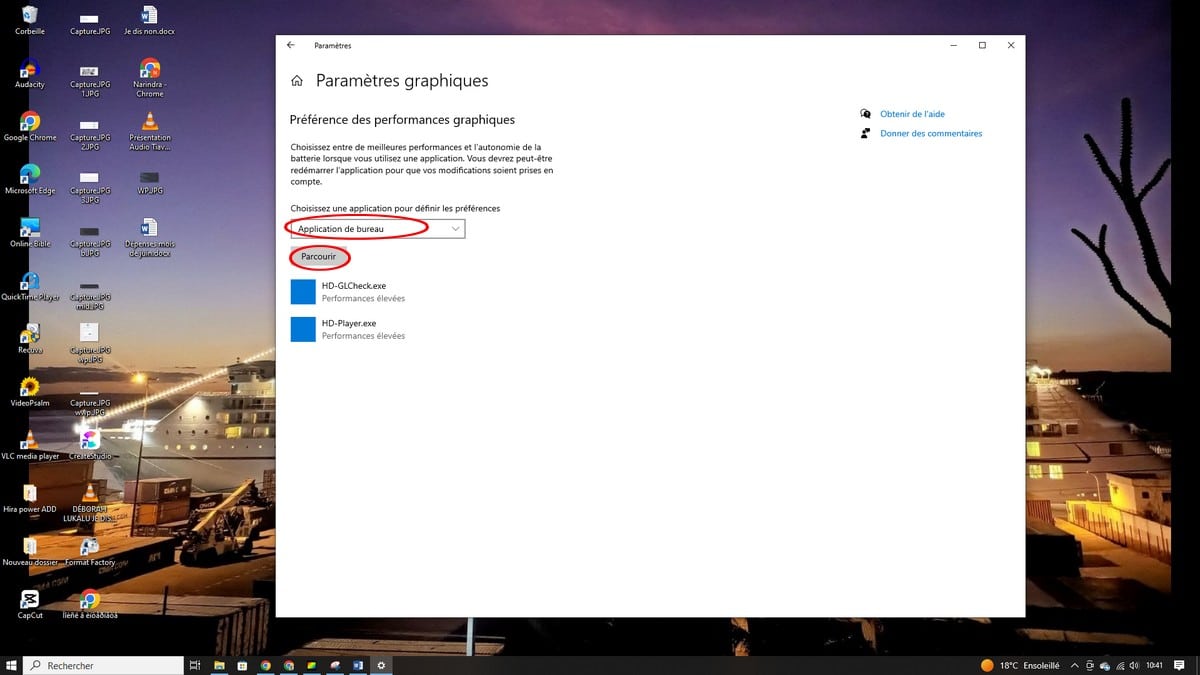
Let's head to the section Graphics Performance Preferences. There, you select the app for which you want to force GPU usage. The drop-down menu offers two types of apps:
- Desktop application : for traditional software installed via a file .exe. Click on Browse, then go get the file .exe software to force.
- Microsoft Store App : for an app downloaded from the Microsoft Store. You select it directly from the list.
Once you've added the app, click Options. Windows then presents you with three options for selecting which GPU to use:
- Let Windows decide : The system automatically chooses between the Integrated GPU and the Dedicated GPU (default setting).
- Energy Savings : uses the embedded graph on the processor, ideal for conserving a laptop's battery life during light tasks.
- High Performance : forces the graphics card dedicated—the one you need for games, the rendering 3D or the editing video.
Select High Performance, then click on To register.
To verify that the graphics processor is indeed the bosse, open the Task Manager, go to the tab Process and look at the column GPU Engine. You can see which GPU each program is using in real time.
Force the dedicated GPU through the Control Panel NVIDIA
If you have a card NVIDIA, you can also go through the Control Panel NVIDIA.
This method is particularly useful on a Laptop equipped with a hybrid GPU Intel and NVIDIA.
Here's how it works:
- Right-click on the desktop, then select Control Panel NVIDIA.
- In the menu on the left, click on Manage 3D Settings.
- Go to the tab Program Settings.
- Click on Add and select the file .exe of the desired desktop application.
- In the drop-down menu Select your preferred graphics processor, select Processor NVIDIA high performance.
- Click on Apply to save the setting.
This setting applies on a per-application basis, giving you precise control over each resource-intensive program. To ensure your graphics card NVIDIA works as well as possible, make sure that your graphics drivers are up to date: a recent version of the drivers NVIDIA can improve performance and fix configuration bugs.
You can Update your graphics card directly from the official website NVIDIA or via GeForce Experience.








 English