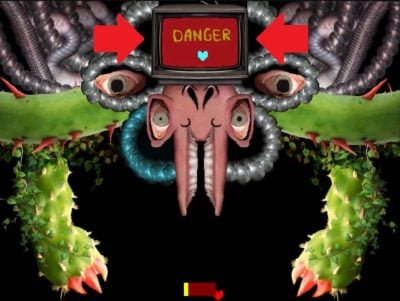
In this article, I present the complete list of Bosses on Undertale and explains how to beat them.
The game is in English by default, but it is possible to put Undertale in French.
Disclaimer: Spoiler alert if you haven't played the game yet!
Complete list of boss on Undertale
| 🗺️ Location | ⚔️ Boss |
|---|---|
| Ruins (Ruins) | |
| Couveneige (Snowdin) | |
| Waterfall | |
| Calciterre (Hotlands) | |
| The Core | |
| New Home | |
| Laboratoire Originel (True Lab) |
Ruins (Ruins)
The Ruins have a mini-boss and a main boss.
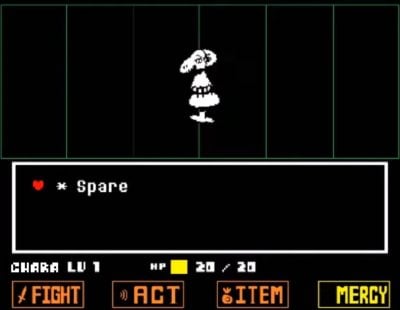
Napstablook
Napstablook is the first mini-boss on Undertale. It is a sleeping ghost that you will encounter in the Ruins.

Talk to the ghost and choose to push it away with force to start the fight with Napstablook.

The battle against Napstablook is inevitable, but not difficult. At first, his tears fall straight down. You will only have to it's easy to dodge them by staying in the lower part..
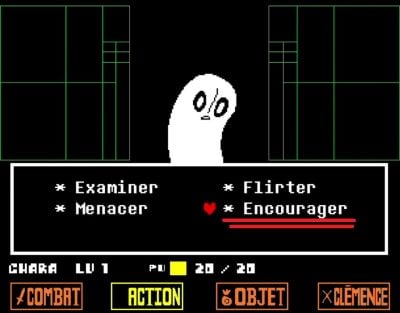
Choose toencourage Napstablook 3 times in a row before the fight is over.
When her tears become more rounded, they are easier to avoid by staying close to the center.
Once the fight is over, Napstablook will get out of your way and you can move on to Undertale.
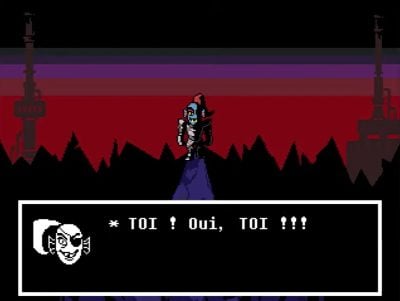
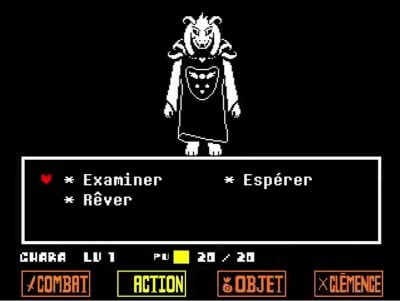
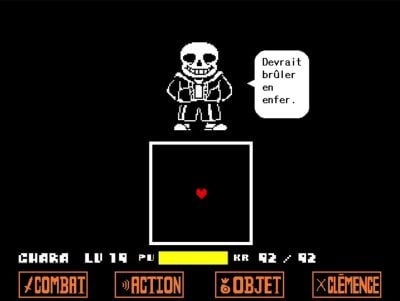
Toriel

Kill Toriel
If you decide to kill her, touching it once will kill itHis speech will then depend on how you killed him.
Example : If you kill her after sparing him, she will say that you are just as cruel as the rest of the monsters and will die laughing.
Saving Toriel
On the other hand, boss's battle with Toriel will take some time if you decide to spare it.
Toriel is a boss with four different attacks :
- Fire falls from the top of the box: Stay in the middle of the box to dodge.
- A propeller of fire spins downward: Likewise here, stay in the center.
- Hand sweep Move to the bottom center of the box, then around the edges once the flames follow you.
- Two-handed sweep Start at the center and move out to the sides.
Disclaimer: Toriel doesn't want to hurt you. If your health is low, her attacks will become less precise.
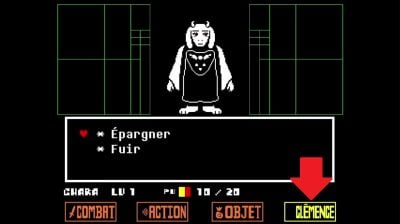
After consistently sparing Toriel instead of attacking her, she will begin to speak to you. Keep sparing her and she'll let you pass..
Go through the doors, up the long corridor and you'll meet Flowey again.

He will confirm whether or not you have killed someone and taunt you. Exit through the main doors and you will move on to the next zone.
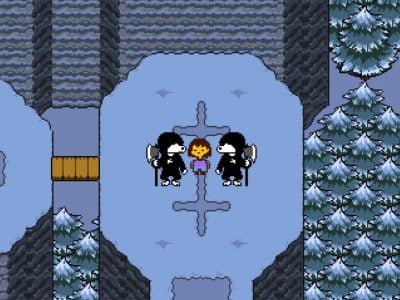
Couveneige (Snowdin)
Couveneige (Snowdin) is the second zone. It comprises a few mini-bosss and a main boss.
Doggo
Not far from the first zone, you'll see a big box.
Coming up ahead, a dog will come out saying that he can only see things that move. This will trigger a mini-boss battle with Doggo.

The trick with the attack of Doggo is of stand still and it won't hurt you.
You have the possibility of sparing him or killing him.
Saving Dogo
- Choose to stroke Doggo and remain motionless while awaiting his attack.
- Once it has been petted, its name turns yellow, indicating that you can now spare him.

Kill Doggo
- Attack Doggo and stand still in the face of his counter-attacks.
- You'll probably need to two or more attacks to kill Doggo.
Remark : You can always choose to stroke it to get a special dialogue before killing it.
After this altercation, Continue your adventure on Undertale towards the east..
Dogamy & Dogaressa
A little further on, you meet two dogs holding axes. They are Canisse and Canibelle (Dogamy & Dogaressa). The fight will take place because of your smell.
Attacks will take the form of rotating blue and white hearts. Dodge them or position yourself where the blue hearts will land. and stand still.

Kill Dogamy & Dogaressa
You can kill them. You'll probably have to at least two shots to kill each dogOnce one of them is defeated, the other will become more aggressive.
Saving Dogamy & Dogaressa
However, if you decide to spare Canisse and Canibelle, you will have to perform certain actions when it's your turn.

- start with select the "Drive" action to change your scent.
- Choose then the action "Sniff" so that dogs discover your new scent.
- You must then stroke the two dogs to spare them.
Attention : Between caresses, they'll launch a big axe attack that will be harder to dodge, so be careful.
Surprised to learn that dogs can pet other dogs, Canisse and Canibelle leave you continue south.
Greater Dog
After going through a zone with a niche and lots of snowballs, one of these snowballs will block your path.

Once you're close enough to the snowball, Maxichian (Greater Dog) will appear.

Maxichien attacks are two different types :
- The first attack is a spear that moves across the screen, changing from white to blue. Try to remain still and let it pass when it is blue..
- The other attacks are "barking" coming from a dog that is snoozing. stay high and keep moving to dodge them.
Kill Greater Dog
If you decide to kill Greater Dog, you must attack it two or three times to end the fight.
Saving Greater Dog
However, to save it, you must act in the following order :

- Beckon (waving)
- Pet (Caresser)
- Play (Play)
- Pet (Caresser)
- Pet (Caresser)
By performing these actions correctly, you can save Greater Dog.
Once you have defeated Maxichien, you can continue eastward across a long bridge.
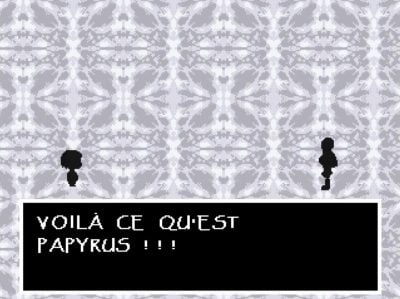
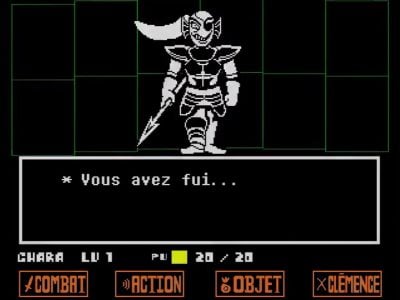
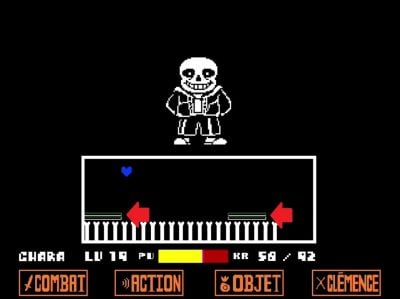
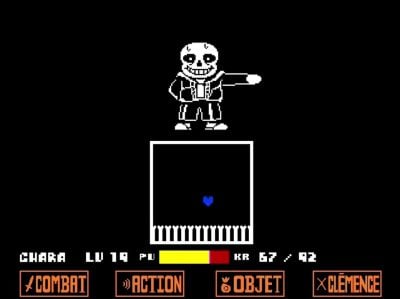
Papyrus
Papyrus is the boss this zone's mainand you'll have to fight him if you want to leave the town of Couveneige (Snowdin).
His first attack will make your blue soul, which means that it is now affected by gravity and will fall to the ground.

You can jump and move with the arrow keysso use them to dodge his attacks.
Remark : This fight can be tough, but if you lose, you don't die and you can come back and try again. If you lose three times, you can skip the fight.
Killing Papyrus
Papyrus has a lot of PV and you'll take time to kill him or to spare him.
If you make him lose HP, he will offer to spare you instead. It's up to you to decide whether you want to spare him or kill him.
Save Papyrus
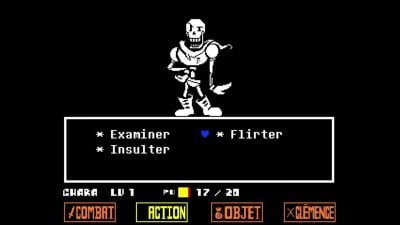
Flirt with him and continue to spare him. until all of its attacks are finished.
Once the fight is over, Papyrus will ask you a question before letting you through.
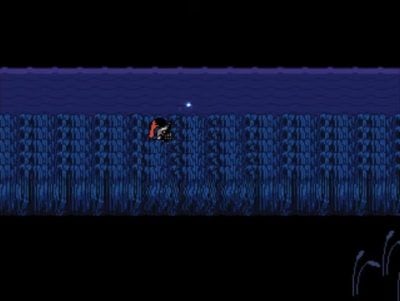
The Falls (Waterfall)
In Undertale, the Chutes (Waterfall) have only two bossBut the fight against Undyne will recur several times during your visit.
Undyne phase 1
Making your way through the area, you'll come to a jetty. You'll suddenly be attacked by a spear and Undyne will appear.
You will then enter into a battle with her where you will have to dodging spears in the combat phase and along the pier.

Continue heading eastIf the spears hit you again, you will be back in combat mode for one of its attacks.
The best way to dodge the spears is to keep heading east. Do take care when moving up or downYou can easily find yourself in the path of the spears.
You'll once again find reeds in which you can hide and won't be able to move for a short scene.

Attention : The next area is a save point, so don't forget to save before continuing.
Undyne phase 2
Further on, you'll find yourself once again on a jetty. But this time.., the ground will light up and spears will rise from these points.
Keep moving in a general south-easterly direction, but your The path will be somewhat determined by Undyne's attacks.You will eventually reach the end of the pier and the spears will stop.

Turn around and retrace your steps to face Undyne before falling into the depths.
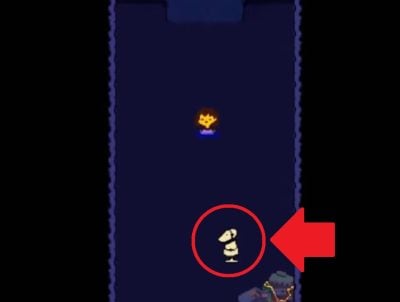
Mad Dummy
As you try to climb out of the sewers you've fallen into, you will be stopped by a training dummy.
Remark : Whatever end you wish to achieve, the method is the same.
Mad Dummy will attack you through the attacks of his dummy friends. The projectiles will follow youThis means you can direct them as far as possible in the direction he's facing to inflict damage.
Please note that rocket-type projectiles must spin once before they can fly off to strike their target. Dummy, SO direct them accordingly.
When it has suffered enough damage, your old companion Napstablook will appear and put an end to the battle.

Follow Napstablook north to have another chance to save before continuing.
Undyne
boss's battle with Undyne takes place at the end of Chutes levelwhen you arrive at the mountain.
After the cutscene, you can save your progress before fighting Undyne.
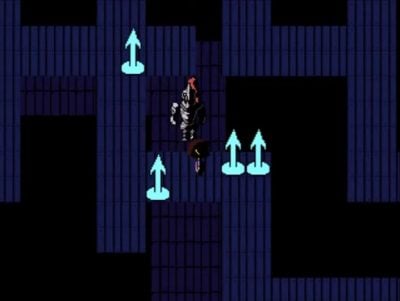
Undyne will make your green heart, which means he cannot move. Then she will shoot arrows at you.

You have a blocking capacity in the form of a blue line. This blue line must point in the direction of the arrows to avoid damage.

Sometimes arrows are yellow, which means they are coming from the opposite direction.
When your heart is red, you must act as usual and dodge the spearsas on previous occasions when you met her.

Killing Undyne
Constantly attack Undyne and don't choose to flee. Once her health is at zero, she will be determined to keep attacking and try to survive.
His attacks will become slow and easy to avoid, and you will be able to finish it.
Save Undyne
Once your heart is red, you have the possibility of escape and she'll come after you, so get back into the tunnel quickly.
Undyne will catch up with you and you'll have to survive its attack to escape again and keep running.

Papyrus will call you During this time, don't panic—Undyne won't approach you while you're on the phone.
After a long horizontal corridor, you come to a desert area.

If you want to favor the Pacifist Route or befriend her or Papyrus, you must bring him a cup of water from the cooler.

Undyne will get up and leave immediately after you have done so.
Remark : Killing her or sparing her will take you through a similar number of rounds.
Calciterre (Hotlands)
In Calciterre (Hotlands), you will meet some boss, the most notable of which is Mettaton. You will have to face him several times in different ways.
Mettaton test 1
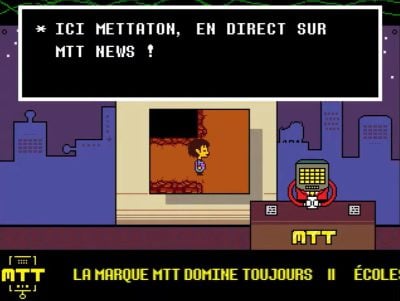
Your first encounter with Mettaton will take place in the laboratorywhile you're talking to Dr. Alphys.

As she explains that her robot could cause problems, it appears in the room and begins a kind of quiz battle.
the Dr Alphys will show you the answers with his handsso keep an eye on her.

The answers are: D, C, B, D, A, D, any one and C.
For the last question, the Mettaton's speech and Dr Alphys' reaction will change depending on the answer you choose.
Remark : During your turn, your actions will have no effect on Mettaton.
Once the battle is over, Mettaton will leave and the Dr Alphys will update your phone and sign you up to a social network, whether you like it or not.
Continue eastward and leave the laboratory.
Mettaton test 2
After a series of puzzles and updates from Dr. Alphys, you'll eventually arrive in a dark area.

Dr. Alphys will hack the lights to turn them on, and you will discover that you are in a cooking show with Mettaton.
First, you must rassemble the ingredients behind you.

Tip: You can carry them all at once, so take them all and bring them back.
Let the scene unfold for a while and you'll find yourself with a jetpack for climbing an incredibly high piece of furnitureYour objective is to obtain a substitute human soul extract.

A stopwatch starts and you must dodging ingredients that Mettaton drops above you. Don't panic, there's plenty of time to reach the top.

Mettaton will leave at that point and you can continue eastward until a new save point.
Royal Guards
Before facing Mettaton again, you will be interrupted by Royal Guards (Royal Guards) which are supposed to protect you from humans.

At least that was the plan until they realized you were the Human and started a boss mini-combat.

Although it is not difficult, this fight against Royal Guards is quite specific. It will be difficult for you to find the right combination to save them quietly.

Choose toact on RG 02 first to clean its armorThis will present a long vertical combat zone with a floating green armor piece.
Remark : If you don't do it enough times, you'll have to clean it again.
After cleaning the armor, you must cSelect RG 01 and choose the "Whisper" action..

He'll confess his feelings to R2 and you can spare the Royal Guards so they can go out for ice cream, which will end the battle.
Don't hesitate to return to the save point to recover your health, otherwise keep going all the way to another dark room.
Mettaton test 3
After Dr. Alphys turns the light back on, you discover that you're in a another Mettaton TV show. This time, it seems you're a journalist on the spot.
Once you are able to act, move to the first object you find. If you go up a little to the right, you'll find a basketball.

Remark : Any object will do, because they are actually bombs. A timer starts, but don't worry, it can't reach zero.
You must now defuse all bombs using Dr. Alphys' application installed on your phone.
Interact with an object and then Press the "Defuse the bomb" button when the object is in the zone and turns green..
A good way to defuse them all at once is to follow this path :
- Go to the bottom and then to the left after the lasers to defuse the bomb.
- Then retrace your steps and turn right to get on the conveyor belt to disarm the script.
- Go straight ahead and jump to defuse the gift.
- Jump left to defuse the basketball.
- Finally, return to the center to defuse the glass of water that Dr. Alphys stabilized on site so that you can finish the job.
Mettaton will leave once the operation is complete, so you can continue heading east.
Muffet
After selling spider pastries, you will arrive at a spider corridor where you will be trapped in a thick web, in which Muffet has trapped you.

This battle can take place from different ways, depending on what you have done so far.
- If you have spent enough money to buy a spider treat at CalciterreYou won't even have to fight; you'll simply be released.
- If you still have your Ruins delicacy, choose to act and eat it in front of her. She will accuse you of theft until she receives a telegram from the spiders of the Ruins, which will end the battle.
- If you don't have any treatsIf you opt for the Pacifist Route, your battle with Muffet becomes more difficult.
Muffet will make your purple heart, which means that you will only be able to move by holding onto one of the three lines.

Muffet owns three types of attacks. She will send :
- Regarding the spiders along these lines to attack you.
- Regarding the doughnuts which will bounce around your combat zone.
- Regarding the croissants that will come back like a boomerang.

Sometimes, his pet appears and chases you upwards, while you must always avoid the spiders.

Once you have succeeded in avoid your pet during the third roundMuffet will let you go and the fight will end. If not, you can continue fighting to defeat her.
Continue on your way to the east.
Mettaton test 4
You will arrive at a kind of castle Mettaton will appear. He'll start singing a romantic song about how you have to die before you fall into a hole.

For the next puzzle, Dr. Alphys will be on hand to help you at the last secondWhatever your success, Mettaton will fight you.

Dr. Alphys will call you in the middle of the battle and tell you topress the yellow button on your phone.

Select the Action option (Act) to do it, then several shots for Mettaton and he will run away.

After another telephone conversation with Dr. Alphys, continue east, then north to reach the MTT hotel.
The Core (The Core)
There is only one single combat of boss who is waiting for you there, and it is none other than Metatron.
Mettaton
Before facing Mettaton, don't forget to save your progress.

Mettaton will reveal something rather strange about Dr. Alphys before take you into battle where she can't help you.

At the start of the fight, you will have a yellow heart who shoots, but your bullets won't damage the robot at all. Instead, you can use them to prevent its attacks from hitting you.

You can only shoot squares with a circle to destroy them or on yellow objects to move them.

Dr Alphys will call you inform about the presence of a switch in Mettaton's back.
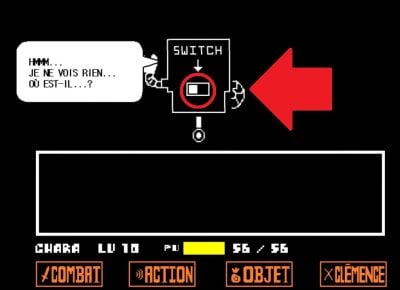
Select "Action" then "Turn Around" to convince Mettaton to turn his back, then click on the switch.
Mettaton EX
After pressing the switch, Mettaton will become Mettaton EX and a graph will appear on the side, showing the ratings.

Remark : If you die while fighting Mettaton EX, you'll come back when he transforms.
Your goal is to raise the ratings to 12,000, and there are several options for achieving this.

- Show off (Boast) is a good choice if you are confident in your ability to dodge attacks. This action will also allow you to increase your Audimat faster.
- Put down (Pose) is a good basic choice that will allow you to steadily increase your rating.
- Playing the Bad Guy (Heel Turn) will earn you points every time you take damage.
- Tackle will earn you approximately 300 points each round.
To dodge his leg attacksyou must :
- Pulling on white legs to get them moving.
- Pull on the yellow legs just before coming into contact with them.
Another attack sends up bombs and mini-Mettatons. Shooting bombs will help you eliminate them. The surviving mini-Mettatons will throw hearts at you.
Remark : If you shoot a bomb, it will explode in a large cross, so you'll need to move away from it immediately afterwards.

His heart attack triggers lightning bolts. You must dodge them and pull on his heart to end the assault.
Remark : Consider stocking up on food to heal yourself. The more expensive the food, the better. Every time you eat "brand name" food, the public appreciates it more based on its price.
More later, knives will also appear on the sides of your box during his heart attack.

Pull on the disco ball and avoid moving when the lasers turn blue.
Once you have reached 12,000 Audimat, Mettaton EX will start receiving phone calls from fansHe will realize that he no longer wants to fight or that his health is exhausted.

The battle will end and Dr. Alphys will approach, and she will be relieved that he is not dead or will act as if there is no problem if you have killed him.
From here, you can move on to the next zone.
Mettaton Neo
If you follow the Genocide RoadMettaton will explain that you are a threat to all life, not just monsters. He concludes that you must be eliminated.

Mettaton se will be transformed into a Mettaton Neo to confront you.
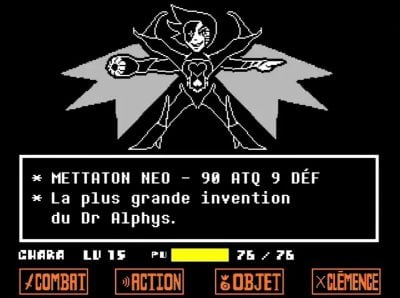
Remark : The only "Action" you can perform is "Examine," which will reveal Mettaton Neo's statistics.
To beat it, simply touch it once.
Once the fight is over, you can move on to the next zone.
New House (New Home)
Depending on your background, Nouvelle Maison (New Home) can be your last zone on Undertale. Warning, spoilers!
Asgore
On arriving in the throne room, you will meet Asgore. With his back to you at first, he will ask you to wait while he waters the flowers.

Surprised when he sees you, he'll end up smiling and then will ask you to follow him when you're ready.
Remark : You will have the opportunity to save your progress several times before facing Asgore.
The first thing Asgore does is to destroy your "Clémence" button (Mercy). You have to fight it whether you like it or not.
You can talk to Asgore three times to reduce its attack and defense.
You can also lower its attack and defense if you still have the Toriel pie with you. Just eat it in front of him.

Remark : Please note that Asgore will never reduce your HP to 1 in a single turn. He will give you a chance to heal yourself. If you do not heal yourself, he may kill you with his next attack.
Asgore's attacks are very similar to Toriel's, but there are some differences and new movements :
- First attack: Flames shoot out from both hands. Dodge them by directing the flames and always making sure you have an escape route.
- Second attack: Flames wave downwards. Try to stay close to the center to dodge them.
- Third attack: A small amount of flames will fall, and a warning will appear on each side in the form of a red exclamation mark. Make sure you cross to the other side before it fills with flames.
- Fourth attack: His eyes will flash according to the color of the scythe before he attacks. This attack can be quite fast:
- Blue : Don't move.
- Red : Move immediately after the previous shot to avoid attacks.
- Fifth attack: Another of its attacks takes the form of a ring of flames. It closes in around you, leaving a small opening. Don't stray too far from the center when you escape.

If you decide toattack Asgore for the first time, you are unfortunately obliged to touch it.
Remark : A white bar will cross the screen, and the number of bars will depend on the weapon you have equipped.
You must strike when the white bar is in the center to touch it!
Once you have inflicted sufficient damage, Asgore yieldsWill you spare him or kill him?
Flowey
Everyone's favorite evil flower returns and claims human souls to take on Undertale.

This boss fight is very different from the othersYou don't really have any conventional shares or a small box to move around in.

Flowey's attacks fill the space, and you must try to dodge them as best you can.

When the "Combat" button (Fight) appears, you must press it. His health bar will appear and he will briefly take damage.
Remark : Many of his attacks are remotely controlled by lasers to help you dodge them. But most of the time, you simply have to keep moving as much as possible.
When Flowey's screen flashes with a warning and a heart, it means that the soul is about to take control. The entire screen then becomes a combat zone.
As usual, dodge attacks. But stay alert, because a "Action" button (Act) will appear and you don't want to miss it!
Tap here for help and you'll receive items that will come in very handy during your battle with Flowey.

Remark : If you die, Flowey will bring you back into the game to kill you again and again. This is kind of a blessing, because you can try your luck against him again!
After having confronted all human souls, from the care items start to appear during normal fight scenes.

Once you have depleted his health bar, Flowey load an old backup where he's at full health and will shoot you with a super laser, over and over again.
After killing you and mocking you repeatedly, the souls will intervene to finish him off.

You now have the option to kill or spare Flowey.

Laboratoire Originel (True Lab)
This area is not available only during a Pacifist Route and contains the real final boss over Undertale.
Asriel phase 1
Flowey turns out to be Asriel, and the final battle against boss will begin. This battle isn't too difficult, as your actions make it much easier.
Alternate these actions and use them as you need them to survive:
- Select “Hope” (Hope) to reduce damage next turn.
- Select "Dream" (Dream) to fill your inventory with healing items.
Tip: Take care of yourself whenever you fall below 10 HP, as it can easily take away that many.
Asriel owns several attacks :
- Starfire (Star Blazing) : A shower of stars will rain down on the combat zone. Stay in the lower corner. The last large star will explode and send out smaller stars, so be careful.
- Shock Breaker (Shocker Breaker) : Exclamation marks will appear just before the lightning bolt, so try to keep moving to avoid them.
- Saber of Chaos (Chaos Saber) : Depending on Asriel's movements, move to the side to avoid his attacks. Then, for the final move, stay in the middle.
- Chaos Breaker (Chaos Buster) : Position yourself where the lasers are not to avoid being shot. The final move will send out a large beam, so move away from where it is pointing to avoid it.
- Black hole (Black Hole) : Asriel will fill the entire screen and begin to suck up the diamonds. Stay as far away from the center as possible so you don't get sucked in.

Asriel phase 2
Asriel will then say that he has used only a small part of its power and transforms into a winged beast.

All you can do for a few rounds is to “Struggle” and dodge his attacks.
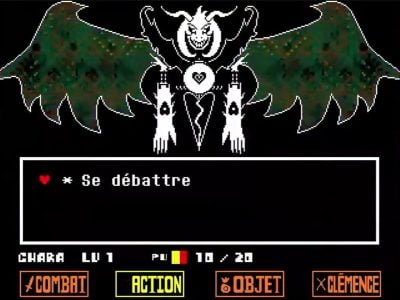
Remark : If you die, your heart will refuse to give up and will rebuild itself.
As the battle progresses, your The "Action" button will change to a "Save" button. and you can choose to save each of your friends.
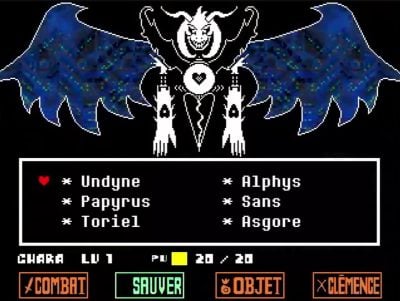
Each of them will attack you in the same way as in their respective boss battles, and you will have to choosing the right actions to remind them of your friendship:
- Undyne: Small Tape, Recipe and Face.
- Alphys : Encourage, Quiz and Call.
- Papyrus : Casse-crâne and Recipe.
- Sans : Glandouiller.
- Toriel: Câliner and Clémence.
- Asgore: Câliner and Clémence.
Select "Save" once more when all your friends have been saved, and you will then be able to save Asriel himself.
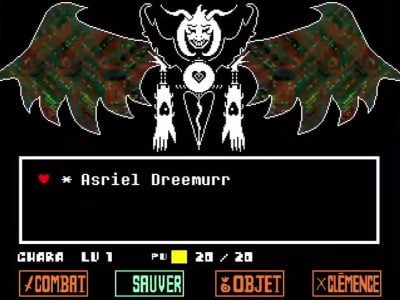
Continue to "Save" Asriel and dodge his attacks. which become less and less intense.
The battle will end and you'll talk to Asriel.
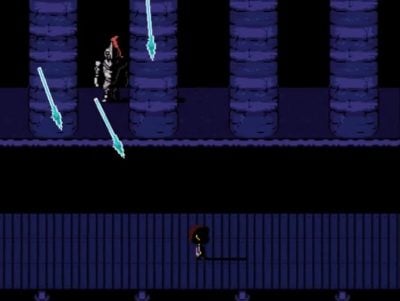
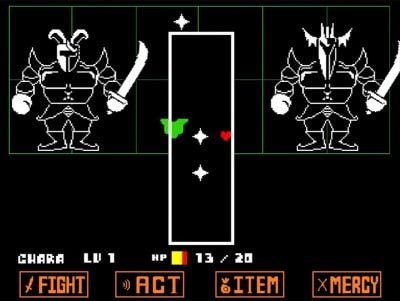
Sans
If you follow the Genocide Road, you won't face either Asgore or Flowey, but Sans.
Remark : It's a difficult battle ahead, and you'll almost certainly have to try several times before you succeed.
Sans will laugh at your many deaths. His attacks are fast and mercilessand he dodges all yours.

As in the fight against Papyrus, your heart turns blue and you'll have to jump over bones, despite the gravity problem.
One of its attacks is to make skulls appear on either side. Use platforms to dodge rays that they shoot.
WARNING : Whether Sans offers to spare you, be sure to attack him. He will kill you if you spare him.
Next, a series of attacks awaits you when Sans will threaten you with its special attack :
- A long attack will occur, during which your combat zone will expand to the side and you will have to dodging bones.
- Other skulls will appear and shoot aggressively, move in a circular motion to dodge them.
Next, Sans will launch its special attack, which consists of do nothing.

To overcome Sans, simplywait until he falls asleep. It will take some time, but eventually it will happen.

Move your combat zone above the "Combat" button, then click on two to kill it.