Create a free Minecraft server in 2 different ways:
Summary:
- Why create a Minecraft server?
- How to create a Minecraft server via a free host?
- How to create a Minecraft server via your pc?
Why create a Minecraft server?
Do you dream of playing with your friends without the fuss? To be the master of a server? Then this tutorial is for you. These 2 ways to create a server are different and it will vary depending on your needs. It's very simple to set up and it will allow you to play with your friends or create a small server.
How to create a Minecraft server via a free host?
For this tutorial, we will use Aternos but from’other hosts of the same type exist.
- First of all, go to Aternos. You must then create an account, and a page will appear:
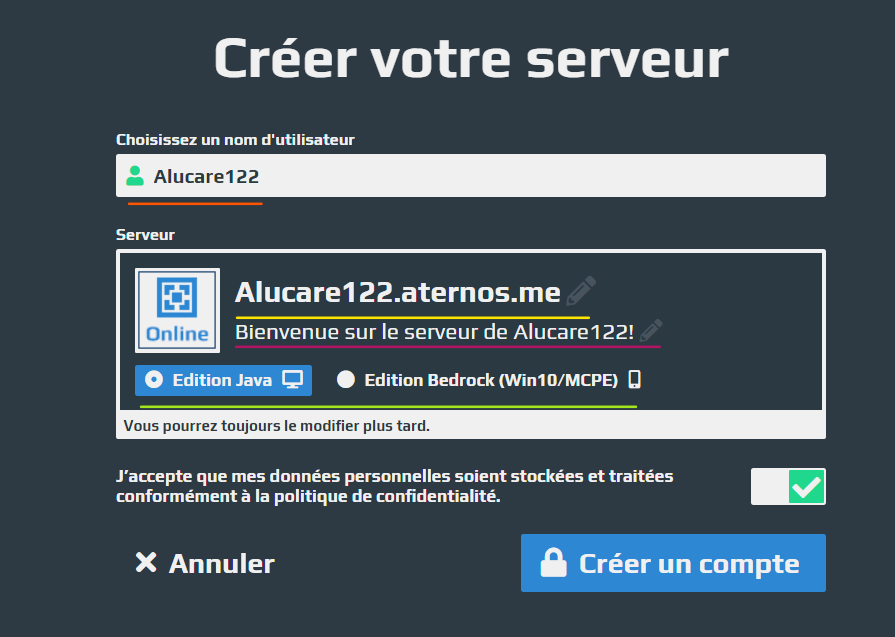
Orange : Choose a username for your account Aternos. This will not be visible on your Minecraft server.
Yellow : This is the’your server's connection address that you will give to your friends. Click on the pencil on the right to change the header of your server IP, which in this case is: Alucare122. Note: You cannot modify the 'aternos.me'.
Violet : This function to insert a message which will be displayed below your server. You can visit you can change it also by clicking on the pencil on the right. Here's what it looks like:

Green : This function allows you to select whether you want your server either ‘Java Edition’, which means creating a server for PC players, or ‘Bedrock Edition’, which is a version for Windows 10 gaming or for telephone players.
- And don't forget to’accept conditionsthen you can Click on ‘Create an account.’.
Once done, you are directed to your server configuration. Here is the main menu for your configuration :
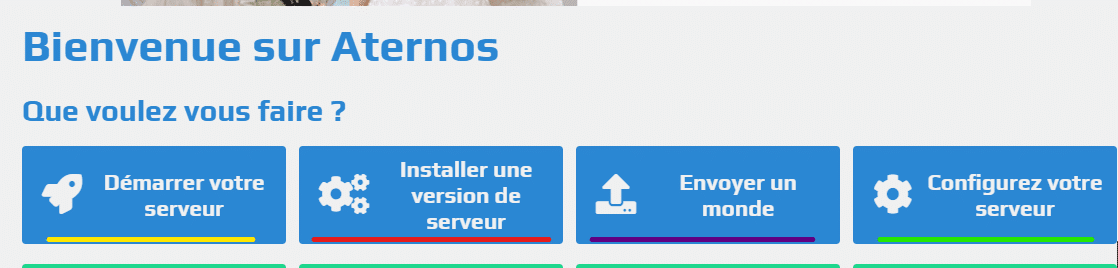
Yellow : This makes it possible to start your serverquite simply.
Red : This makes it possible to choose your server version (Ex: 1.11.2), whether you want it to be Spigot or Bukkit, then the versions of your Forge mods and plugins, Modpacks, and also the ‘Glowstone’ versions for your plugins. On the Bedrock Edition, you can choose the Bedrock version as well as Pocketmine.
Violet : This function allows you tonvoyer un monde. For example, you can send a map you've made on your multiplayer server.
Green : This part regroups several functions :
- the maximum number of players your server can accommodate, the game mode (Survival, Creative, etc.) and the difficulty of your world.
- Regarding the more advanced functionalities are present as the ‘Whitelist’; if you activate it, this will prohibit players from logging on unless they are on that famous white list. You can also activate or deactivate animals, NPCs, command block, cracked versions (non-premium), progress, theft, monster, and nether. Spawn protection is useful if you want to keep, say, 10 radius protected at the world's main spawn.
- You can now turn on your by clicking on ‘Start your server, then Start’. You will be placed in a queue. You will therefore have to wait (the duration may vary depending on the number of people). All you have to do is share the IP with your friends !
How to create a Minecraft server via your pc?
Sometimes Minecraft hosts are not sufficient or do not suit you. You can therefore host your own server on your PC. And that's where ‘Ngrok’ comes in. to let your friends join the server. Please note that every time you close the Ngrok command prompt and restart it, the server IP address will change.
Tip: If you have a bad connection, this technique is not recommended.
- First, you will need to download a blank Minecraft world as well as The Ngrok mechanism:
Blank Minecraft world: Select the version you want and download it.
NgrokYou need to create an account, then download Ngrok .
- Next, create a folder for your server, here: Server Minecraft. Rename the world Minecraft ‘spigot-version' in 'spigot' quite simply.
- Next, make a text document named ‘start’ and copy/paste this: (remove the spaces between the lines if there are any)
java -Xms1024M -Xmx1024M -jar spigot.jar -o false
PAUSE
- Then do: ‘Files -> Save As -> File name: start.bat -> Save‘

- You can therefore delete the .txt document ;
Here is what it gives:

- Now that that's done, IRun the file ‘start.bat’‘A command prompt appears; wait for it to load completely, then Press any key to close it..
- You must then click on the file created named ‘eula’ and replace ‘eula=false’ with ‘eula=true.’. (These are the general conditions). Save and close the file.
- Then restart the server (the start.bat file). Wait for the server to be created, which may take several minutes. The start.bat is your server, so if you Close the start.bat command prompt., then your server will shut down. And that's it, your server is ready! To see if it works, start Minecraft, then add a server by adding in ‘Server address’: localhost

- If all goes well, you can connect to your server. (And if your start.bat is running, of course).
- You can modify your server settings in the text document ‘server’.
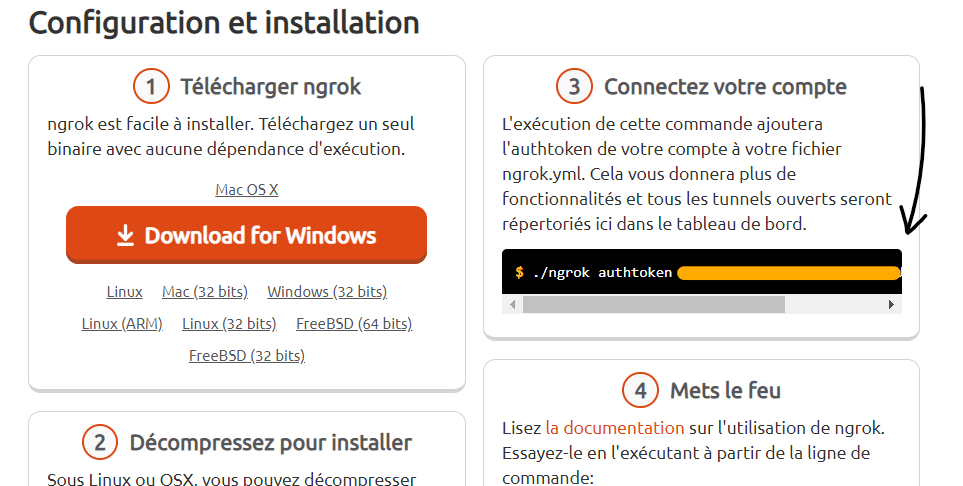
- Now all that remains is to open an ip address so that your friends can reach your server and play with you. To do this, run the ngrok file you installed at the beginning. A command prompt will appear, which is normal. Go to the Ngrok website to copy your ‘authtoken’, which can be found here: (Copy this without the ./ It's no use)
- Then return to the ngrok command prompt, and paste the authtoken:
![]()
- Let her touch you ‘Enter’ to execute the command. If you have done it correctly, you should See above ‘Authtoken saved to configuration file:...’, like this:

- Once you have only one thing left to write and execute, it is: ngrok tcp 25565 -region eu
- Copy/Paste and press Enter. The following should appear:
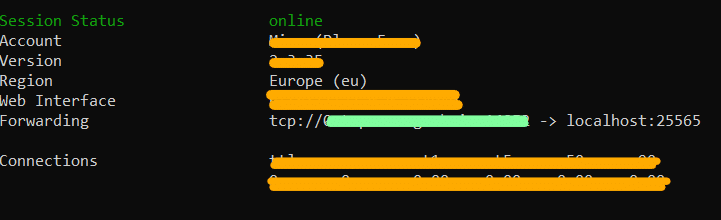
Where I put a green line, it is your server's IP address that you must share with your friends so that they can join. If you close the command prompt and restart it, the IP address will change. (You will need to re-enter the auth token and ngrok tcp).
You can now simply play with your friends and bug-free.
See the rest of the guides on Minecraft: