Thanks to Photoshop, you can undertake several projects. Photoshop is a software with which you can put your imagination to work. Indeed, most designers use this photo editing tool to create visuals. For example, it is possible to replace a face of another with Photoshop. If you don't know how to do it, let's discover together in this article how to replace a face with Photoshop?
This video explains in detail how to replace a face with Photoshop:
How to replace a face in Photoshop?
Here are the steps to follow to replace a face with Photoshop easily:
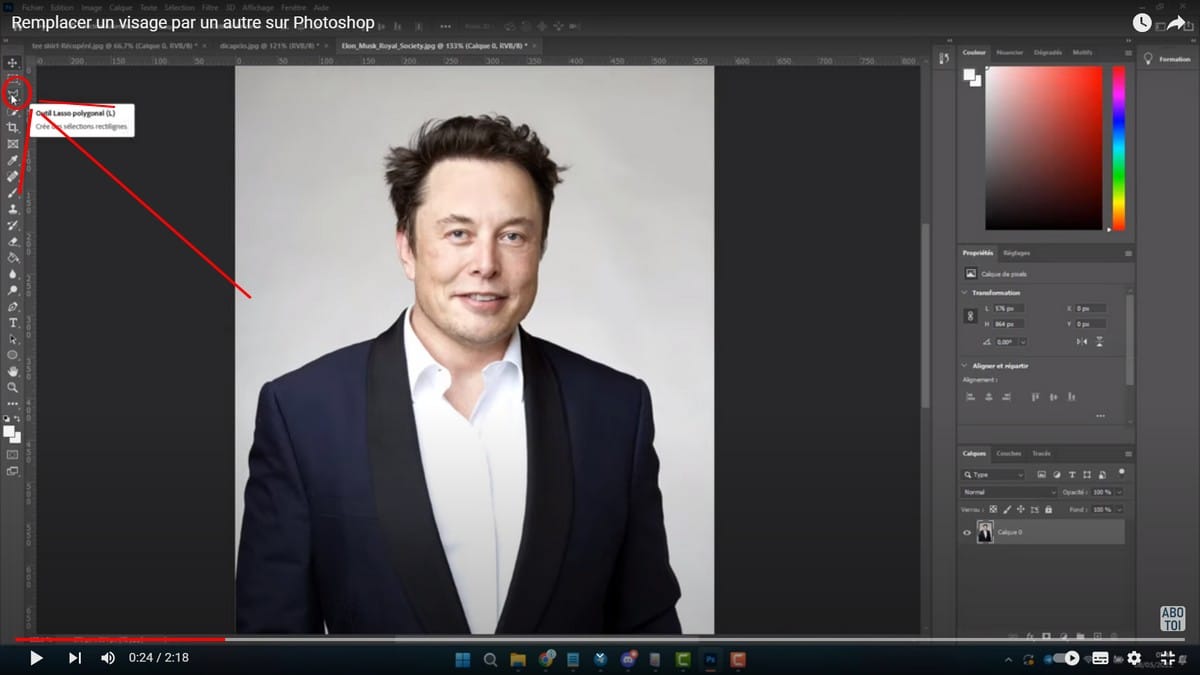
- First, open the software;
- Then, import 2 different photos on the software;
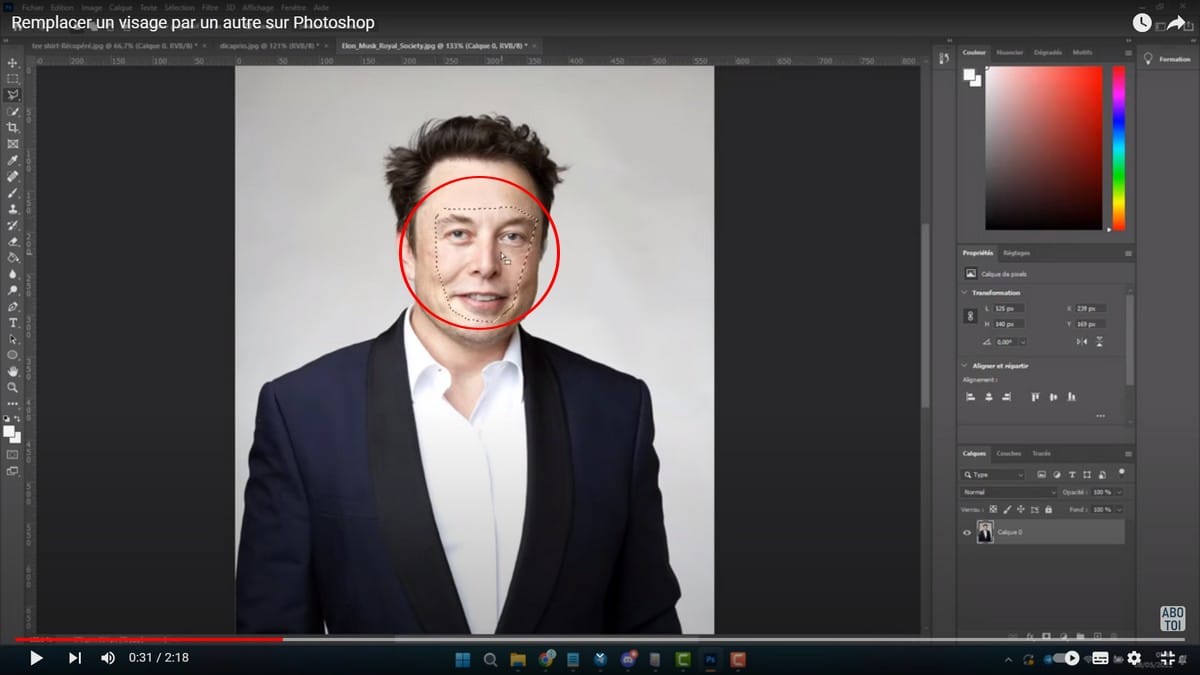
- Then the first is to select the face of the first person using the lasso tool;
- Copy the selection by doing Ctrl + C;
- Then, go to the second photo and paste the selection by doing Ctrl + V;
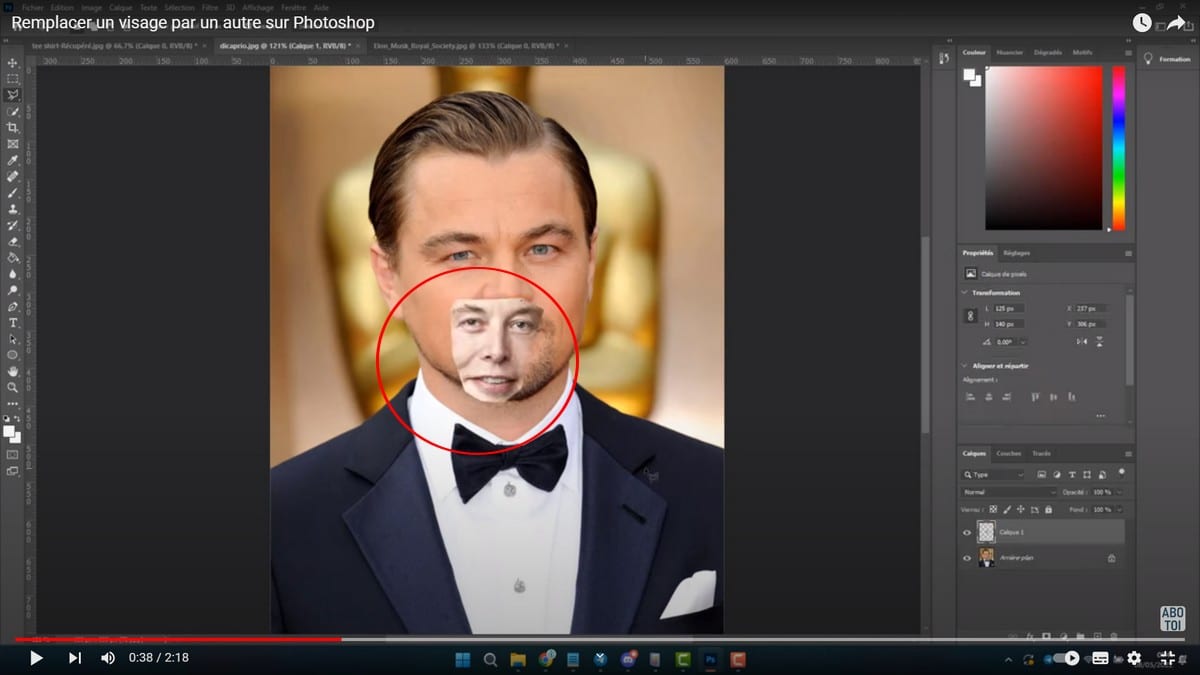
- Go to the layers on the right of your screen, click on the layer of the first photo and reduce its opacity;

- Click Edit, then Free Transform;
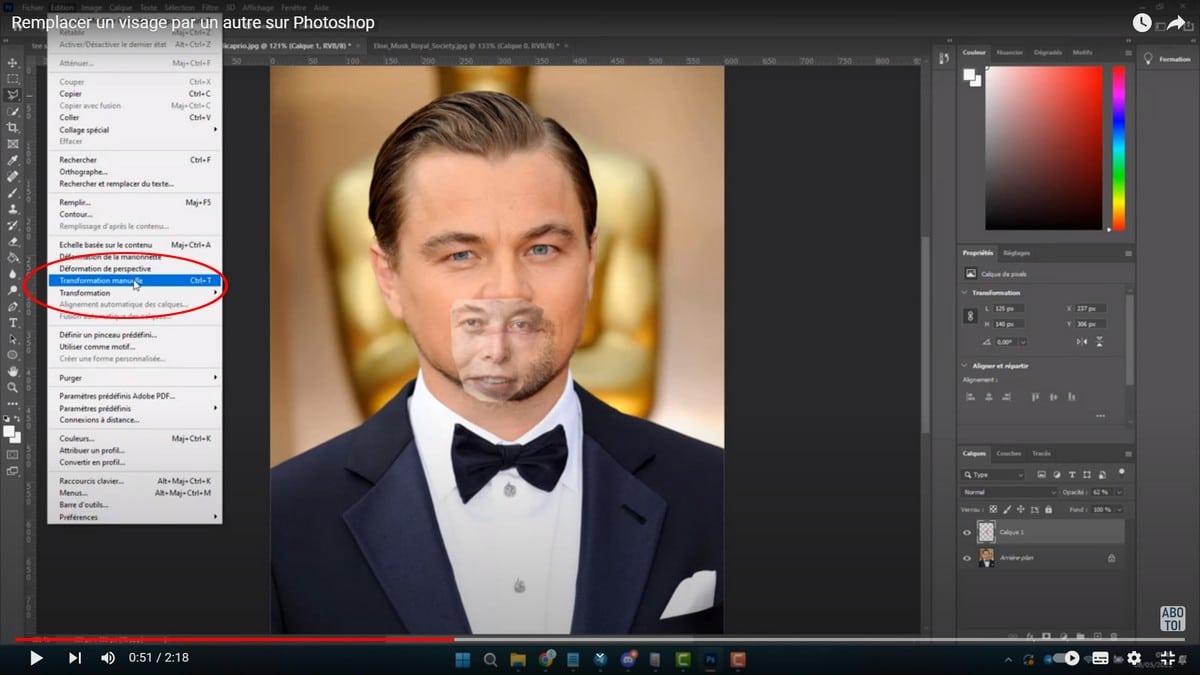
- Move photo 1 and enlarge it;
- Rotate to adjust the photo, click Enter to commit changes;
- Retrieve the selection of photo 1 again by pressing control and on layer 1;
- Select layer 2, unlock the layer by clicking on the security icon on the right of your screen;
- Reduce the selection a bit, go to the Selection tab;
- Click on Modify, then Contract;
- Choose the number of pixels, and click on Ok;
- Click the Delete key to remove the face from layer 2;
- Return to layer 1, and set the opacity to maximum;
- Deselect by clicking on selection then deselect;
- Merge the two layers by clicking on both and pressing Control;
- Go to the Edit tab, then Auto-merge layers;
- And finally, click Ok to make the changes.
Now you know how to replace one face with another using Photoshop.