In this part of Hogwarts Legacy, you continue the investigation of ancient magic by finding the lost pages of the book found in the reserve. It begins, however, with a seemingly unrelated mystery.
Depending on your Hogwarts House, one of four different scenarios will occur that will lead you to the Lost Pages. Gryffindor students will go on a short adventure with near-headless Nick, Hufflepuff students will visit a retired Auror at the request of the Eldritch Diggory portrait (which will entail a brief stay in Azkaban), Ravenclaw will help Ollivander find a lost wand and the Slytherin students will help a house-elf from the Black family find a ring. In any case, you will have to meet the ghost of Jackdaws. Here are the details of what happens in the Forbidden Forest in Hogwarts Legacy.
If you have any questions about the game, come ask them and discuss the game on our discord server:
Resting by Richard Choucas
After encountering the ghost of Richard Jackdaw and agreeing to end up in the Forbidden Forest, you head to where he died in hopes of finding the lost pages including the map that led him to his death. It explains the password that must be spoken to open a hidden passage near a bird bath and leads you through the Forbidden Forest to this passage while explaining the landmarks that can be used to find said bird bath. 'birds.
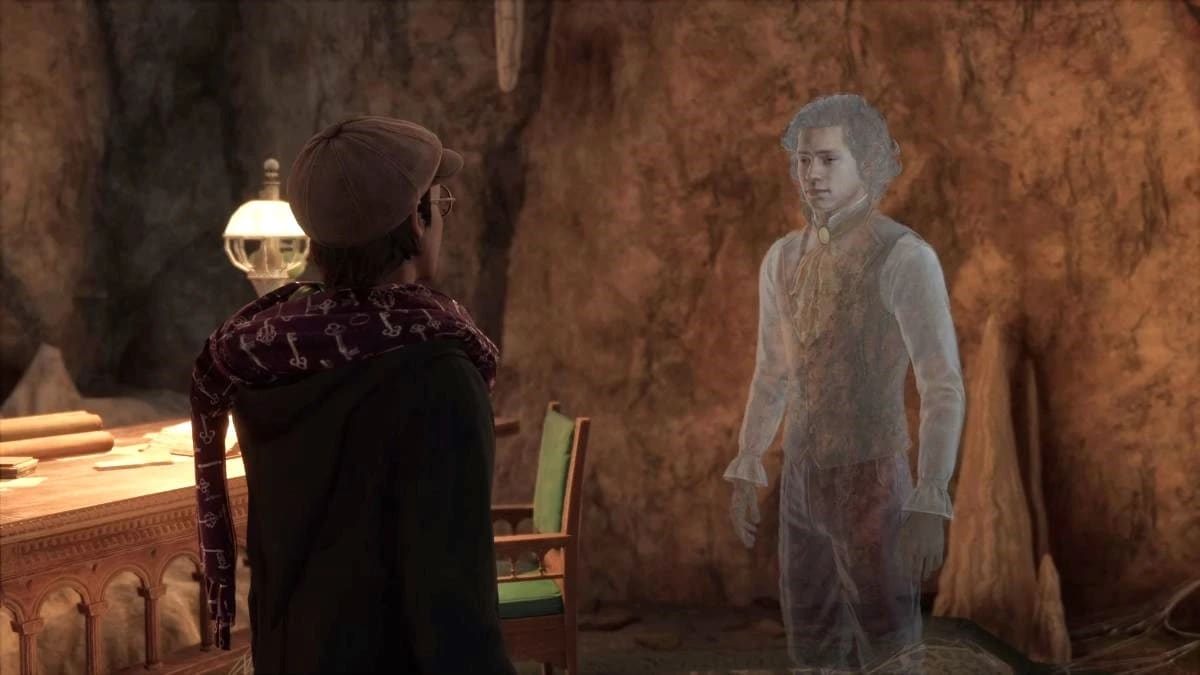
After reaching a Flame, Richard decides he doesn't want to go back to where he died and encourages you to continue without him. It's best not to take the path full of spiders and take the one to the right of the flame, which is much safer. Turn left at the tree covered in way too many warning signs and find the waterfall he mentioned.
From there it's a short marathon to a lake and then to the birdbath. Speak the words and prepare for a fight as the Goblins are waiting to ambush you when you attempt to enter the cave. The Sentinel that speaks to you starts the fight with a red shield, which can be broken using spells like Incendio, but otherwise the Goblins are fairly unthreatening as long as you dodge and block when necessary.
It is then time to enter the cave and discover its secrets. There you will find three runes arranged near a door that serve as an introduction to a recurring puzzle in the cave. Shooting each rune with the base spell will open the door and start bridging further, but each rune has a timer and will reset if you don't do it fast enough. After crossing the bridge, cobwebs block the path, which can be burned with Incendio.
Chains of spinyback spider attacks ensue to attack you. Their web shots can be deflected and countered using Protego and Stupefy, but the best way to take them down is to ignite them with Incendio, then cast a basic spell on them to cause them to explode and deal high damage that can also damage nearby enemies.
Although there is a path leading forward, it's best to sneak through the low opening first and try to ignore the creepy little spiders. Eliminate the spiders in this room and grab the chest for loot, then go back through the opening and down the ledge to the lower path.
Turn right to find a floating platform that can be pulled around using Accio. Head up the ramp on the right and beat the spiders to grab a chest, then come back and pull the platform over it. Jump on it and use Accio on the opposite handle to pull the platform towards it and reach a large chest in the alcove beyond.
Then return to the path by going in the opposite direction to reach more spiders and another puzzle door. The third rune is on the far left and is hidden by the cave walls as you enter this area, but the trick is the same as before, so touch all three runes to open the door and continue assembling the bridge.
Go deeper and through another low opening to progress, and find a ledge with another floating platform ahead. Use Accio to summon him, and he will explore a bit. There are several different handles that can be targeted from there, so you should start by turning towards the opening on the right, using Accio on the handle to pull the platform towards it.
From there you need to follow the path, burn the web on the right to get a chest, then head to a room full of egg sacks. These can be destroyed with Incendio to prevent them from bursting into multiple small spiders, but they can be defeated with a single hit anyway, so that's not too much of a problem.
Several thorn spiders try to ambush you in the next room, but after defeating them, you can open the large chest for a reward. Then retrace your steps as the farthest path is blocked by a fallen pillar that cannot be moved.
Return to the floating platform, take the path that requires climbing a small cliff, and collect the loot before returning to the floating platform and heading down the path the spiders were heading to earlier.
Fend off the ensuing spider attack and grab the chest as you continue on your way. Upon reaching the largest chamber, check left to find another chest, then enter and go down the path on the right to find another floating platform with a few handles nearby.
Go up the ramp and onto the platform, then use the handles to move it down the hall and reach the ledge for another chest. Then, pull the platform to the opposite ledge for another chest. Drop down to the objective and defeat some spiders to find the Matriarch of Thorns. This one can be killed instantly with ancient magic or be ignited and bombarded with spells like other spiders. She is accompanied by scurriors who bury themselves under the ground in an attempt to attack from below. They can be torn from their attempt to dig the ground using Levioso, leaving them defenseless and easily attacked for a short time. All in all, it's not too difficult a fight if you've leveled up enough in the game.

After beating the spiders, you need to head up the slope to the door and down the path next to it to reach a chest and spot some more runes from the day before. Go up the path, so that you are at the top of the path near the slope and can see the rune. There is another rune above the path, near the door, and another on the left. Hit all three with the base spell to complete the bridge and open the path forward.
Across the bridge is a large open chamber with hidden chests on the left and right sides of the entrance. There lies the body of Jackdaw, long dead, his head severed by three swords stuck in the ground.
Check Jackdaw's body to collect the missing pages, then prepare for a fight, as Sentinels and Pensieve Sentinels come to life around the room and prepare to fight. Expelliarmus is fantastic here at interrupting any of their attacks and briefly removing their weapons, though they will summon new ones.
After defeating the first wave, a giant Pensieve Guardian comes to life and also attacks. He uses non-blocking attacks that can be dodged or interrupted using the Expelliarmus, and after defeating the first two more will enter the fight. After beating them, you can interact with the Ancient Magic Point to activate a door leading to a strange chamber. When you get there, the chamber will be flooded, but you will be protected by a bubble, to continue to a large chamber where you will encounter a portrait of Professor Rackham.
Apparently everything done so far has been designed to lead someone who can see ancient magic to the Map Room, but Rackham refuses to say more until the book is out. placed on a pedestal at the back of the chamber.
Rackham tells you to return with the book for more information, and upon taking the upper bedroom door, he unlocks a Floo Flame for the Map Room and reveals that it's under Hogwarts castle.
If you have any questions about the game, come ask them and discuss the game on our discord server: