To Change the language in Word, go to File > Options > Language, select the language you want, then click Set as default Then restart the software. You can set the menu language and the spell-checker language separately.
This tutorial applies to Word 2016 and subsequent versions, including Microsoft 365.
This video shows you, step by step, how to change the language on Word :
Explanatory video in French by Alucare, ideal complement to the page. View video (you can use YouTube's automatic translation)
How to change the language in Word?
The wording may vary slightly from one version to another, but the process is always the same. Here are the steps in detail.
- Open a document or just run Word.
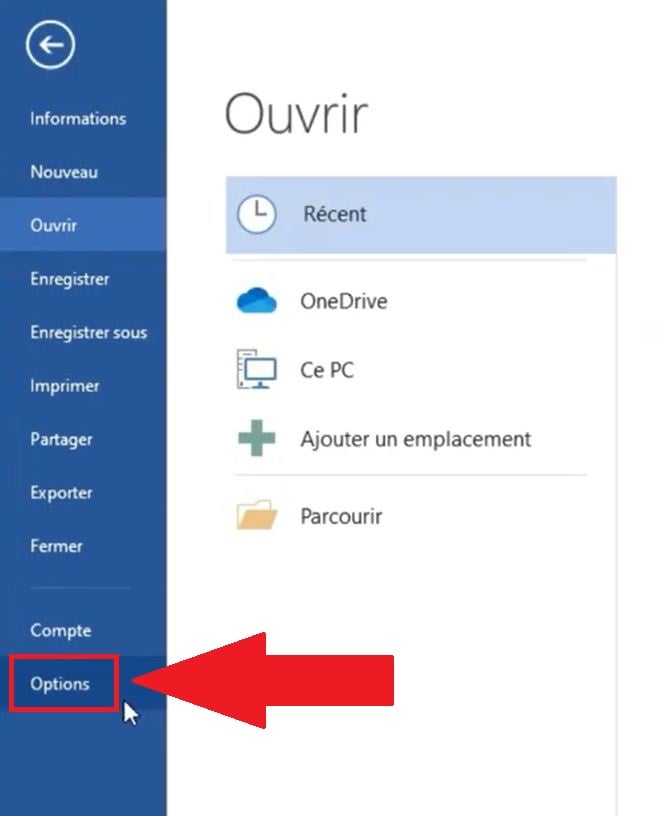
- Click on the’File tab top left (or File (in English).

- In the menu on the left, scroll all the way down and click on Options.
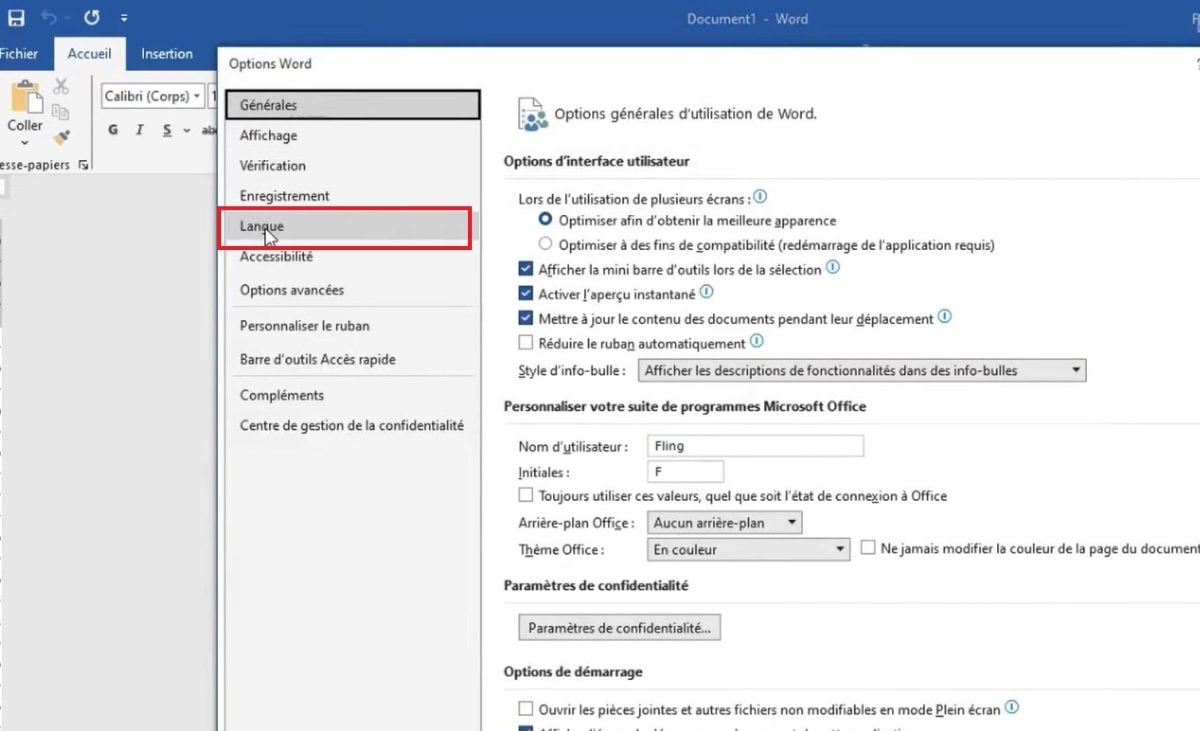
In the dialog box Options Word, click on Language in the left-hand menu. You'll then see two distinct sections, and this distinction is important: many people confuse them.
- The display language : It manages the menus, the ribbon, and the interface of’Office.
- The development and verification language (wording may vary depending on the version): It manages the spell check, grammar, and text editing.
You can certainly keep an interface in French while writing a document in English, with the appropriate corrector.
If the language you're looking for isn't on the list, you can easily add it:
- Click on Add a display language (Where Add a language (in English).
- Choose the preferred language in the list that appears.
- Click on Install to download the language pack.
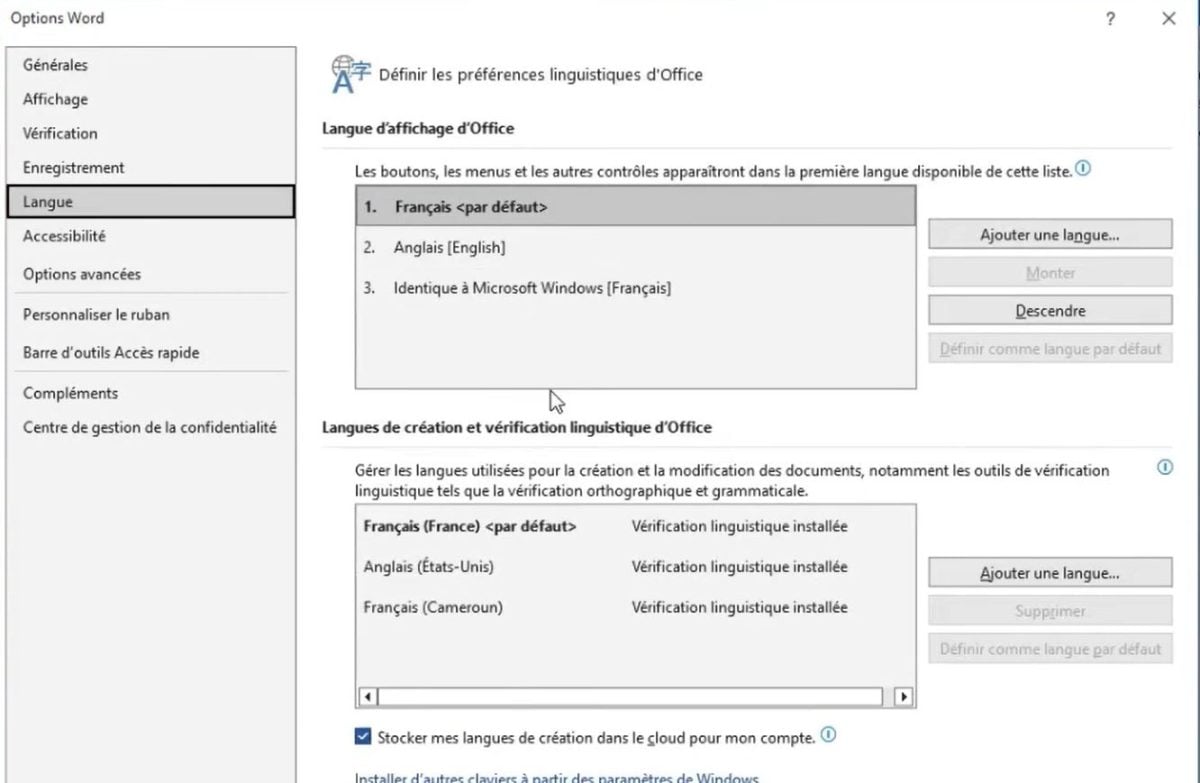
Once the language is available, set it by default so that it automatically applies to all your new documents:
- Select the language from the list.
- Click on Set as default.
- Valid with OK.
- Restart Word to implement the change.
If the change doesn't take effect, close the app completely and then reopen it. Also make sure the language is set to installed and not just added. Some language packs depend on the settings Windows or your account Microsoft : Check them to see if a language is still unavailable.
Change the verification language for an existing document
The previous setting applies to new documents. For a document that has already been written, you must make changes directly to the text.
- Select all text with Ctrl+A.
- Go to the tab Revision in the ribbon.
- Click on Languagethen on Set the verification language.
- Select the language you want from the list.
- Valid with OK.
The spell checker now applies the grammar rules of the selected language to the entire document.
Changing the Language on a Mac, in Word Online, Excel, and PowerPoint
The procedure is similar in other applications Microsoft Office.
On Mac, the verification language can be set through the menu Tools > Language. The interface display language depends on the system settings for macOS.
On Word Online, the display language is linked to your settings account Microsoft. You can change it in your account settings at Microsoft 365. The verification language is selected in the tab Revision, just like on the desktop version.
On Excel and PowerPoint, the path is the same: File > Options > Language. The language settings apply to the entire suite Office.
For more tips, check out:








 English